
Choosing the right Drip Tape Fittings can determine whether a field irrigates evenly or leaks before sunrise. In practical installations, small fitting errors often become expensive water losses. A connector may look secure, yet pressure can pull it loose from thin tape. The seven tips in this guide focus on compatibility, durability, sealing, and maintenance. They are based on common installation observations and manufacturer guidance, not guesswork. Measure the tape. Check the hose. Confirm the operating pressure. These simple checks are easy to skip. That is where problems begin. Different tape thicknesses, diameters, and outlet designs require different fittings. A barbed connector for one wall thickness may damage another. I have seen installers tighten clamps until the tape creased. It felt secure, but the crease restricted flow.
Reliable selection also means considering water quality, filtration, temperature, and seasonal handling. Sand or algae can block narrow passages and make a good fitting appear defective. A trustworthy evaluation should include trial fitting, visual inspection, and a pressure test before full deployment. Run water through a short section first. Look for wet spots. Listen for escaping air. Do not rely only on product photographs or the lowest price. Material quality, UV resistance, and replacement availability matter in working fields. Still, no fitting is perfect for every layout. That deserves honest attention. A recommendation should explain its limits, installation method, and expected service conditions. The following seven tips will help growers, technicians, and buyers compare Drip Tape Fittings with greater confidence. They encourage careful decisions, fewer leaks, and more consistent irrigation across rows.
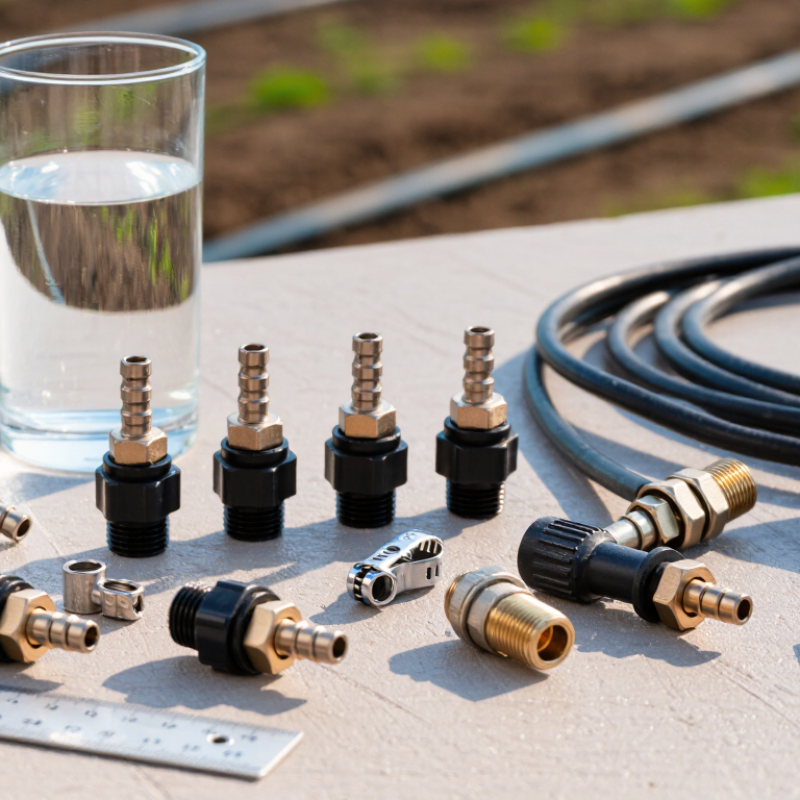
Drip tape fittings connect thin-walled irrigation tape to supply lines, valves, and flushing points. Their role is simple but critical. They distribute water evenly and prevent pressure loss near each connection. During field inspections, leaks often appear around fittings rather than along the tape. The connection matters.
Seven practical checks can improve fitting selection. Match the fitting size to the tape’s measured inner diameter, not a remembered specification. Choose a durable material that tolerates sunlight, fertilizer, and seasonal temperature changes. Inspect the barb shape; sharp, well-spaced barbs should grip without cutting the tape. Check whether the fitting includes a reliable seal or gasket. Confirm its pressure rating exceeds the system’s working pressure. Select a design that can be flushed easily. Finally, test compatibility with filters, valves, and nearby pipe sizes.
Small details matter. A loose nut may cause a slow leak that stays hidden under mulch. Excessive force can also damage the tape. I once tightened a connection too aggressively and created a weak spot beside the fitting. That mistake changed my installation routine. I now wet the tape, seat it evenly, and check every joint before covering the line. Run the system at normal pressure, then inspect for movement, spray, or damp soil. Some fittings feel secure by hand but loosen after repeated pressure cycles. That is why practical testing remains more reliable than appearance alone.
The chart shows estimated water flow from 100 meters of drip tape at different emitter spacings and nominal emitter flow rates. These values are calculated from the number of emitters per 100 meters multiplied by the emitter flow rate. Use the estimated flow to select fittings, valves, filters, manifolds, and supply lines with suitable flow capacity.
Choosing drip tape fittings starts with compatibility, not appearance. Measure the tape’s outside diameter, inside diameter, and wall thickness with calipers. Small errors can cause leaks.
Confirm whether the tape uses a threaded, compression, or barbed connection. Match the fitting’s inlet size to the tape opening, not to a guessed label. Check the barb length and diameter carefully. A short barb may pull out under pressure. A wide barb can crush thin tape.
Also inspect the fitting’s sealing surface. It should sit evenly against the tape without sharp edges.
Pressure matters too. Compare the fitting’s rated pressure with your irrigation system’s working pressure. Include pressure changes during valve startup. These brief surges are easy to overlook.
I once selected a fitting by nominal size alone. It connected quickly but loosened after repeated field use. That mistake taught me to test a sample before purchasing a full quantity.
Cut a short tape section and make a trial connection. Fill it slowly, then inspect for twisting, dripping, and movement. Leave it pressurized for several minutes. If the tape slips, the dimensions are probably wrong.
Material and temperature should also match the installation environment. Sunlight, fertilizer, and water quality can affect service life.
Keep a few spare fittings nearby. Field conditions are rarely as neat as product tables suggest.
7 Tips for Choosing Drip Tape Fittings
Tip: Match the fitting to water flow first. A 16 mm tape may look similar across suppliers, but wall thickness and inlet design can differ. Calculate the combined flow from every lateral. The FAO Irrigation and Drainage Paper 56 reports that well-managed drip systems can reach 90–95% field application efficiency. That performance depends on balanced delivery, not tape alone. An undersized connector creates a visible bottleneck near the manifold.
Tip: Check pressure at both ends of the field. Many drip tapes operate within a narrow pressure range, often around 0.6–1.0 bar, depending on emitter design. Use fittings rated above the expected operating pressure. The Irrigation Association recommends testing distribution uniformity, because pressure variation directly affects emitter output. A pressure gauge before the filter and another at the farthest row can reveal problems quickly. One gauge is sometimes not enough.
Tip: Design fittings around the layout. Use straight connectors for long runs, tees for divided blocks, and shutoff valves where zones need separate control. Select fittings that grip the tape without crushing it. Compression rings should seal firmly, yet remain removable for repairs. Flush ends need accessible end caps or valves, especially where sediment collects. I have seen neat installations fail because the final row had no practical flushing point. Recheck spacing, bends, and access before installation. Small layout mistakes become expensive during harvest.
Drip tape fittings deserve closer attention than their small size suggests. FAO AQUASTAT reports that agriculture uses about 70% of global freshwater withdrawals. Therefore, a minor leak can waste water continuously across long planting rows. In field inspections, I have seen a fitting look secure while a thin stream formed beneath the tape. That mistake was easy to miss.
Tip: Compare materials before comparing prices. Polypropylene fittings are light, affordable, and suitable for many seasonal systems. Acetal fittings usually offer better stiffness and thread stability. Stainless steel resists corrosion strongly, but it can be unnecessary for short-term layouts. Tip: Check pressure ratings. ISO 9261 provides requirements and test methods for agricultural irrigation equipment. Still, laboratory performance may not match rough installation. Tip: Match the fitting to tape thickness and connector dimensions. Small mismatches create uneven compression.
Tip: Test leak resistance under operating pressure, not hand pressure. Tip: Inspect barbs for clean edges and consistent depth. Sharp or shallow barbs can damage tape or loosen during temperature changes. Tip: Consider ultraviolet exposure, fertilizer contact, and repeated removal. Tip: Replace questionable seals early. They are cheap compared with lost water and crop stress. USDA irrigation guidance also emphasizes system maintenance and pressure control, yet field conditions remain imperfect. I would not select fittings from material names alone; actual tests, storage conditions, and installer technique still deserve review.
7 Tips for Choosing Drip Tape Fittings
Drip tape fittings decide how quickly a system installs and how reliably it performs. In field inspections, I check seven details: match the tape diameter, verify wall thickness, inspect barb depth, confirm pressure tolerance, choose tool-free sealing, allow easy flushing, and compare replacement costs. Measure the tape first. A fitting that feels “almost right” can still leak under pressure.
Installation time affects labor value. Select connectors that seat firmly without excessive force. Their internal passage should not restrict flow. The USDA Natural Resources Conservation Service notes that well-designed drip systems can achieve about 90% application efficiency. Poor connections can undermine that advantage. Keep spare gaskets nearby. Small parts disappear quickly on large sites. I have seen crews reuse hardened seals, saving minutes but creating leaks later.
Maintenance deserves more attention than the purchase price. Choose fittings with visible locking points and smooth surfaces that do not trap sediment. The FAO AQUASTAT database reports that agriculture accounts for approximately 70% of global freshwater withdrawals. That makes preventable leakage financially and environmentally significant. Check fittings during flushing, especially after fertilizer injection or winter storage. A pressure test before covering the tape can reveal weak joints early. It is not foolproof. Soil movement, heat, and rough handling still cause failures. Compare the fitting’s unit price with labor, water loss, replacement frequency, and downtime. The cheapest connector may be the most expensive after one season.
The benchmarks below are practical selection guidelines for agricultural drip-tape systems. Actual performance depends on tape specifications, water quality, operating pressure, installation practices, and local labor costs.
| Tip | What to Evaluate | Recommended Benchmark or Check | Installation Impact | Maintenance Impact | Overall Cost Value |
|---|---|---|---|---|---|
| 1 Match the fitting to the tape | Confirm tape inside diameter, wall thickness, outlet size, and fitting style before ordering. | Use the fitting size specified for the tape; do not force a connector that is too large or too small. Typical drip-tape wall thicknesses range from approximately 5 to 15 mil. | Low effort Correct sizing reduces stretching, cutting, and rework. | Properly matched fittings reduce leaks and tape pull-out at the connection. | Low lifecycle cost Accurate sizing prevents replacement and water loss. |
| 2 Check pressure and flow requirements | Compare the fitting’s working-pressure rating with the system’s regulated pressure and start-up surges. | Many drip-tape systems operate at relatively low pressure, commonly around 8–15 psi at the tape inlet. Select fittings rated above the maximum operating pressure. | Low to medium effort Pressure testing is recommended after assembly. | Correct pressure compatibility helps prevent blowouts, disconnected tape, and irregular emission. | Medium value A slightly stronger fitting can cost more but may reduce field failures. |
| 3 Compare installation methods | Decide whether the project needs barbed, compression, or tool-assisted fittings. | Barbed fittings are generally quick for manual installation; compression fittings usually require more precise insertion but can provide a firmer grip and easier adjustment. | Manual installation preferred Choose a design that can be inserted without excessive force or special tools. | Tool-free designs simplify in-season repairs, while reusable designs can reduce replacement waste. | Low to medium cost Evaluate labor time as well as the purchase price. |
| 4 Prioritize leak-resistant sealing | Inspect gasket quality, barbed geometry, locking rings, and the connection’s resistance to pull-out. | Choose fittings that maintain a seal during thermal expansion, hose movement, and normal pressure cycling. Avoid visibly damaged or distorted sealing surfaces. | Medium effort Cut the tape squarely and fully seat it on the fitting. | Reliable seals reduce wet spots, soil erosion, fertilizer loss, and the need for repeated tightening. | High value Leak prevention often provides greater savings than choosing the lowest purchase price. |
| 5 Plan for flushing and cleaning | Evaluate whether the fitting allows line flushing, end access, and quick removal of blocked sections. | Include flush valves or removable end fittings where practical. Filtration commonly uses screen or disc filters selected according to water quality and system flow. | Medium effort Adding service points requires planning during layout. | Accessible flush points make it easier to remove sediment and reduce emitter clogging. | Medium to high value Higher initial cost can be justified where water contains sediment or algae. |
| 6 Verify material and chemical compatibility | Consider sunlight exposure, temperature, fertilizers, water-treatment chemicals, and seasonal storage conditions. | Use fittings made from materials intended for agricultural irrigation. Protect unused fittings and tape from prolonged ultraviolet exposure and extreme heat. | Low effort Material selection is mainly a purchasing and storage decision. | Compatible materials are less likely to become brittle, swell, crack, or lose sealing performance. | Medium value Durability matters most in systems reused across multiple seasons. |
| 7 Calculate total cost, not unit price | Include fitting price, labor, tools, repairs, water loss, replacement frequency, and end-of-season handling. | Compare at least three cost categories: installation time per connection, expected repair frequency, and estimated service life under the actual operating conditions. | Planning required A short field trial can reveal real installation time before bulk purchasing. | Track leaks and failed connections during the first operating cycle to validate the cost estimate. | Best-value option The lowest unit price is not always the lowest total cost over the system’s service life. |
| Practical decision rule: Select the fitting that matches the tape precisely, remains secure at the system’s maximum pressure, supports routine flushing, and minimizes labor and repair frequency. For high-sediment water or repeated seasonal use, maintenance access and durability generally deserve more weight than the initial unit price. | |||||
To learn more about any of the products and services provided by Abbott Ball Company, Inc., simply complete the form below.